Many homeowners frequently ask, “Can I put a vapor barrier on my concrete walls?” during renovations or when finishing a lower level. The short answer is yes, but doing it correctly requires an expert understanding of how moisture moves through porous masonry and foundation walls. A concrete foundation acts like a hard sponge, constantly absorbing moisture from the surrounding wet soil through capillary action. This process, often referred to as “wicking,” can transport gallons of water into your home’s structure every single day without proper mitigation.
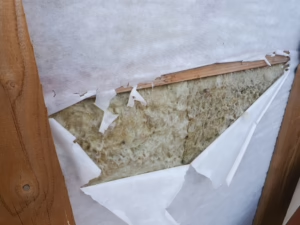
At Safer Home Services LLC, we specialize in identifying these hidden moisture paths. Our expertise in how water, moisture, and humidity affects a home allows us to evaluate the specific needs of your foundation before you invest in finishing materials. If you apply the wrong material to a basement wall, you might trap water inside the structure and cause significant moisture build-up. This trapped moisture often leads to severe mold growth and the eventual decay of nearby building materials like wood framing.
Proper basement waterproofing relies on letting the concrete dry naturally while protecting your finished living areas from excess moisture. Neglecting this balance can lead to structural degradation and poor indoor air quality that affects the health of everyone in the residence. We will examine exactly how to handle a vapor barrier installation safely and effectively. You will learn the crucial difference between various barriers and when to use specific commercial products for foundation repair to keep your home safe.
The Physics of Moisture in Masonry Walls
Understanding the physics of moisture is the first step toward a successful renovation project. Water exists in three states within a home: liquid, capillary, and vapor. While most people focus on stopping liquid leaks, water or moisture movement through foundation walls is often the more insidious threat to finished basements. Effective moisture management requires an in-depth strategy that addresses all three forms of water movement simultaneously.
Modern building science teaches us that moisture always moves from warm to cold and from wet to dry areas. This fundamental principle dictates how a vapor barrier functions within any residential or commercial wall assembly. You must control water movement to prevent moisture from reaching cold surfaces inside your home, which leads to condensation. When warm, humid indoor air meets a cold concrete surface, it reaches its “dew point,” resulting in liquid water formation on the wall.
The Role of Capillary Action
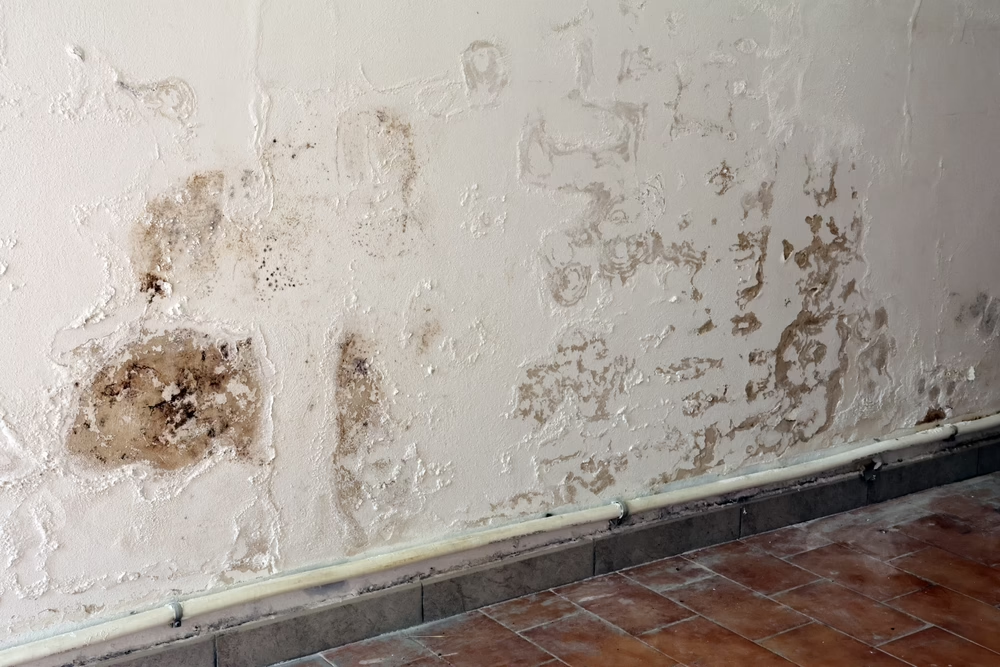
A standard concrete block wall absorbs ground moisture through natural capillary action throughout the entire calendar year. If you place a vapor barrier directly against this wet concrete without a drainage strategy, the moisture has nowhere to go. The water will pool behind the plastic sheeting, eventually breaking down adhesives and creating a massive mold problem. This is why Safer Home Services LLC often recommends a drainage mat or a small air gap between the concrete and the barrier to allow for moisture escape.
Classifying Vapor Retarders and Permeability
Professionals differentiate between a true vapor barrier and a breathable vapor retarder. While many use the terms interchangeably, they are technically defined by their permeability, which allows for varying degrees of moisture movement. The permeability of a material is measured in “perms.”
| Barrier Class | Perm Rating | Material Examples |
| Class I (Vapor Barrier) | 0.1 perms or less | Glass, sheet metal, 6-mil polyethylene |
| Class II (Vapor Retarder) | 0.1 to 1.0 perms | Unfaced expanded polystyrene, bitumen-coated kraft paper |
| Class III (Vapor Retarder) | 1.0 to 10 perms | Latex or enamel paint, fiberboard |
Choosing the right rating is essential to make sure that your wall assembly can dry out if it ever becomes wet from an unexpected leak. In many below-grade applications, a Class I or Class II system is preferred to keep the soil gases and moisture out of the living space, but the specific choice depends on your local climate and the home’s existing exterior waterproofing.
The Importance of Complete Basement Waterproofing
When considering if you can put a vapor barrier on your concrete walls, you must first address external drainage. Effective waterproofing starts on the exterior by redirecting rainwater away from the foundation.
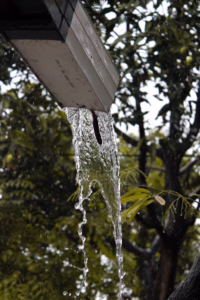
Without proper gutters and grading, any interior vapor barrier will eventually fail due to extreme hydrostatic pressure from the soil. Water will always find the path of least resistance, which is often through the microscopic pores of your foundation.
A high-quality applied vapor barrier serves as a critical line of defense against rising dampness and soil gases. In many regions, radon mitigation is a necessary step that integrates directly with your vapor barrier and air seal strategy. By sealing the foundation walls, you create a healthier indoor environment while protecting the structural integrity of the concrete slab. Radon is a colorless, odorless gas that can seep through concrete, making a continuous seal vital for safety.
Crawl Space Encapsulation
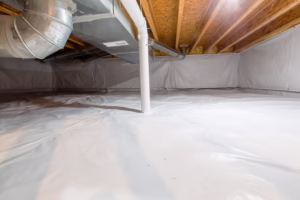
If you are working in a crawl space rather than a full basement, crawl space encapsulation is the gold standard for moisture control. This process involves covering the ground and walls with heavy-duty plastic sheeting to create a controlled environment. A well-installed vapor barrier in these spaces prevents wood rot in the floor joists and the rim joist area. Encapsulation also helps to stabilize the temperature of the crawl space, which can lead to significant energy savings on your monthly utility bills.
Air Barriers vs. Vapor Barriers: Why You Need Both
Many people confuse an air barrier with a vapor barrier, but they serve two distinct purposes. An air barrier stops the physical movement of air, while a vapor barrier prevents the diffusion of moisture. For a concrete block wall, you often need both to make sure that humid indoor air doesn’t hit the cold block. Air leakage can carry significantly more moisture into a wall assembly than vapor diffusion alone, making air sealing a top priority for Safer Home Services LLC.
Using a combination of rigid foam and a vapor barrier can effectively manage these temperature differentials. The rigid foam acts as a thermal break, keeping the interior surface of the wall assembly warm and above the dew point. In modern construction, an applied vapor barrier in Haddonfield, and surrounding locales, is often integrated into the insulation layer to save time and labor. This approach guarantees that the basement walls remain warm and dry, reducing the load on your HVAC system.
The Stack Effect
It is also important to consider the “stack effect” in your home, where warm air rises and escapes through the attic. This creates a vacuum in the lower levels, pulling in damp air and soil gases through any cracks in the foundation. By installing robust vapor barriers and air barriers, you interrupt this cycle and create a more stable indoor climate. This sealing strategy is a hallmark of high-performance building design.
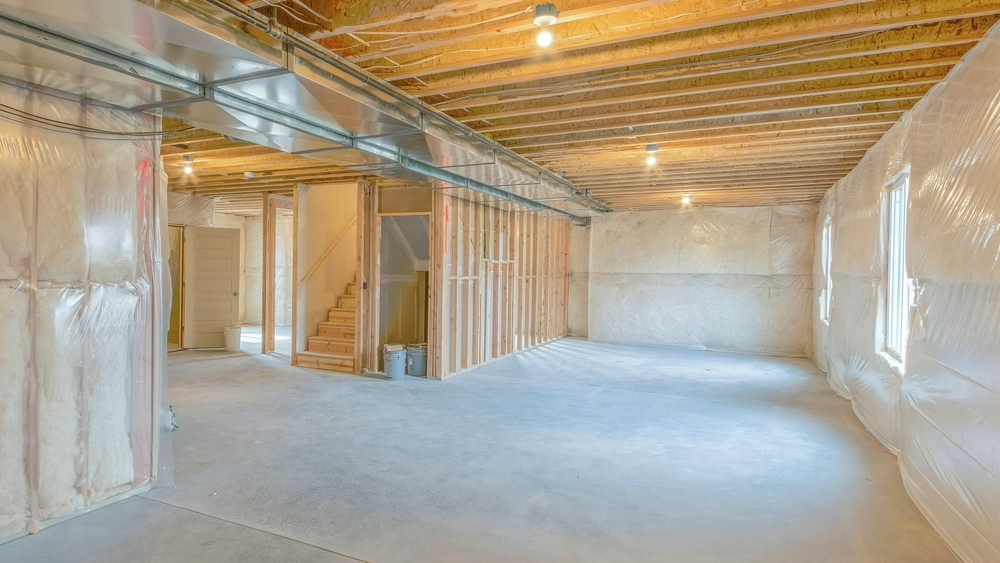
Selecting and Installing the Best Materials
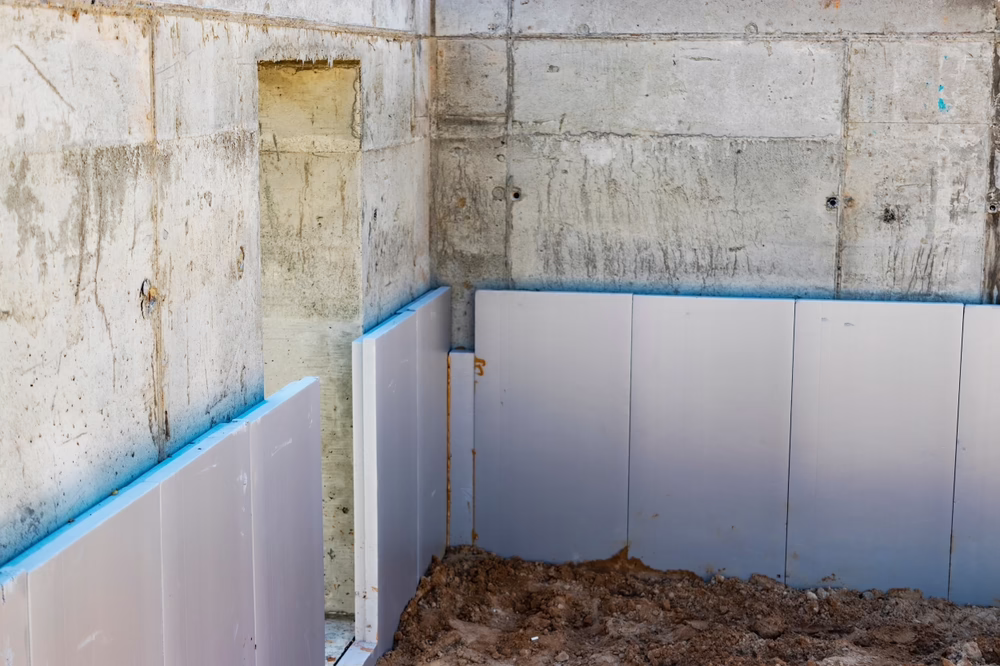
Choosing between different barriers depends on the current condition of your basement walls. For a concrete block wall, a semi-permeable vapor retarder is often safer than completely impermeable plastic sheeting, as it allows the block to dry toward the interior if water penetrates the exterior coating.
- Rigid Foam Insulation: Extruded polystyrene (XPS) can act as both insulation and a vapor retarder. Foam insulation with a thickness of two inches or more typically provides an adequate rating for most residential basements.
- Spray Foam: Closed-cell spray foam provides an air seal and an applied vapor barrier in one step. It adheres directly to the concrete, leaving no gaps for mold to grow.
- Polyethylene Sheeting: Heavy-duty (6-mil or higher) plastic remains a cost-effective choice but must be installed with extreme care to keep all seams and penetrations perfectly sealed.
- “Smart” Vapor Barriers: These advanced materials can change their permeability based on humidity levels, remaining closed when dry but opening up to allow drying when moisture increases.
Installation Best Practices
The installation process must be meticulous. First, make sure the concrete wall is clean and free of efflorescence; the white, powdery substance that indicates water movement. If you find cracks, Safer Home Services LLC can perform the necessary foundation repair to stop active leaks before the barrier goes up.
When using plastic sheeting, overlap the seams by at least six inches and seal them with high-quality waterproof tape. The barrier should extend from the top of the foundation wall down to the concrete slab or into a drainage system. Mechanical fasteners with rubber gaskets should be used to secure the sheeting to the masonry without creating large air leaks. Pay close attention to utilities like pipes and electrical conduits; each must be carefully flashed and sealed.
Long-Term Maintenance and Sustainability
Managing moisture in block walls requires a multi-faceted approach. You must consider how the concrete slabs interact with the walls to create a continuous moisture-proof envelope. A dedicated applied vapor barrier on the floor, combined with wall protection, offers the best results for basement waterproofing. This “bathtub” approach guarantees that moisture cannot enter from the ground or the surrounding soil.
In green building projects, the focus is on sustainable materials that provide a high-performance air barrier. Whether you have a poured concrete wall or block walls, the goal remains the same: keep the water out and the heat in. Utilizing low-VOC adhesives and recycled content in insulation also contributes to a healthier home environment.
Annual Inspections
Regular maintenance is key. Homeowners should inspect their basement walls annually for signs of peeling paint, musty odors, or new cracks. Making sure that downspouts extend at least six feet away from the foundation can prevent many problems before they start. A proactive approach to home maintenance will protect your investment and guarantee that your vapor barrier in Cherry Hill performs for the life of the structure.
In conclusion, you can absolutely put a vapor barrier on concrete walls, provided you use the right materials and techniques. From rigid foam to spray foam and traditional plastic sheeting, there are many ways to protect your foundation. By integrating a vapor barrier with professional waterproofing insights from Safer Home Services LLC, you can enjoy a dry, healthy, and energy-efficient living space. Contact us today to get started.
Jack Lyons
Co-owner of Safer Home Services LLC