As the weather turns cooler and leaves begin to fall, homeowners often focus on decorating and preparing their yards. Winterizing your house to avoid mold and water damage is an important aspect of fall home preparation that is sometimes forgotten. As the fall season gives way to winter, the ideal environment for moisture issues that may require expensive repairs is fostered.
Winter brings moisture in many forms. Snow melts, ice dams form on roofs, and cold temperatures cause condensation inside walls and attics. When moisture meets cold surfaces, mold can grow quickly. Water damage from winter weather costs American homeowners thousands of dollars annually. By winterizing your house now, you prevent these expensive problems before they start.
The key is addressing water vulnerabilities in autumn when the weather is still manageable for outdoor work. Once snow arrives, climbing ladders and working on roofs becomes dangerous. The best time to start working on home winterization is in the fall.
Indoor Moisture Control and Mold Prevention
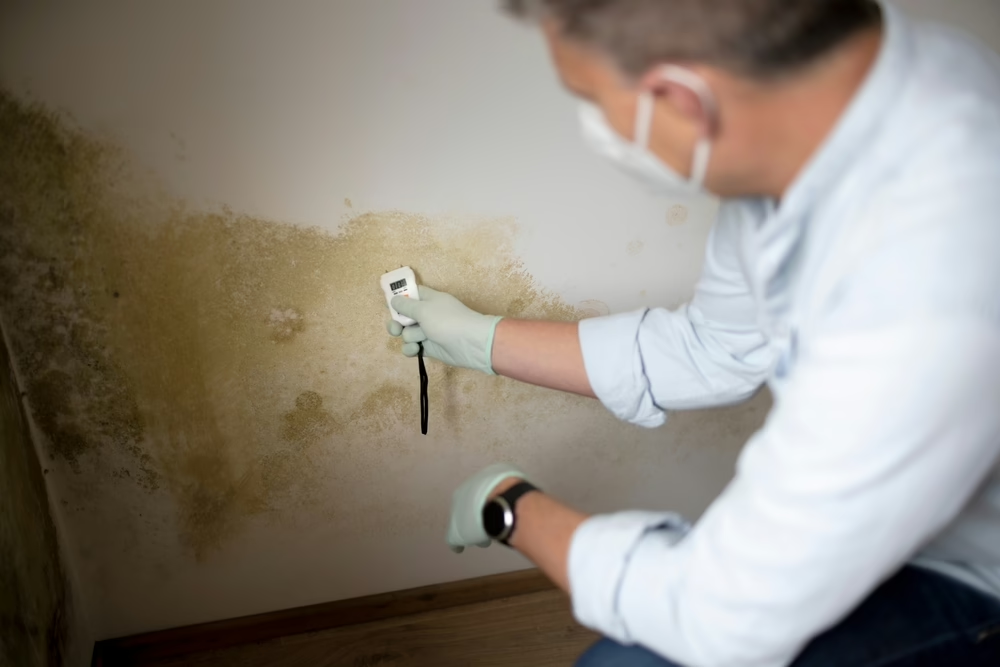
Before winter arrives, you need to control moisture inside your home. Indoor humidity creates ideal conditions for mold growth, especially in basements, bathrooms, and crawl spaces. If you’ve already experienced leaks or flooding, professional water damage restoration in South Jersey from Safer Home Services LLC can help eliminate hidden moisture and prevent mold before winter sets in.
Test Your Indoor Humidity Levels
The ideal range for indoor humidity is between 30 and 50 percent. Mold grows when the relative humidity is higher than 60%. To measure the humidity in your home, you can purchase an inexpensive hygrometer from any hardware store. Install dehumidifiers in the impacted areas if the humidity levels are high. Because baths and showers significantly increase the amount of moisture in the air, bathrooms require extra care.
Improve Bathroom Ventilation
Bathrooms are major moisture sources. Check that your bathroom exhaust fans work properly by holding a tissue near the vent opening. The tissue should move slightly toward the fan. If it doesn’t, your fan may be clogged with dust or not functioning. Clean or replace bathroom exhaust fans before winter. Run fans during showers and for 20 minutes after to remove moisture.
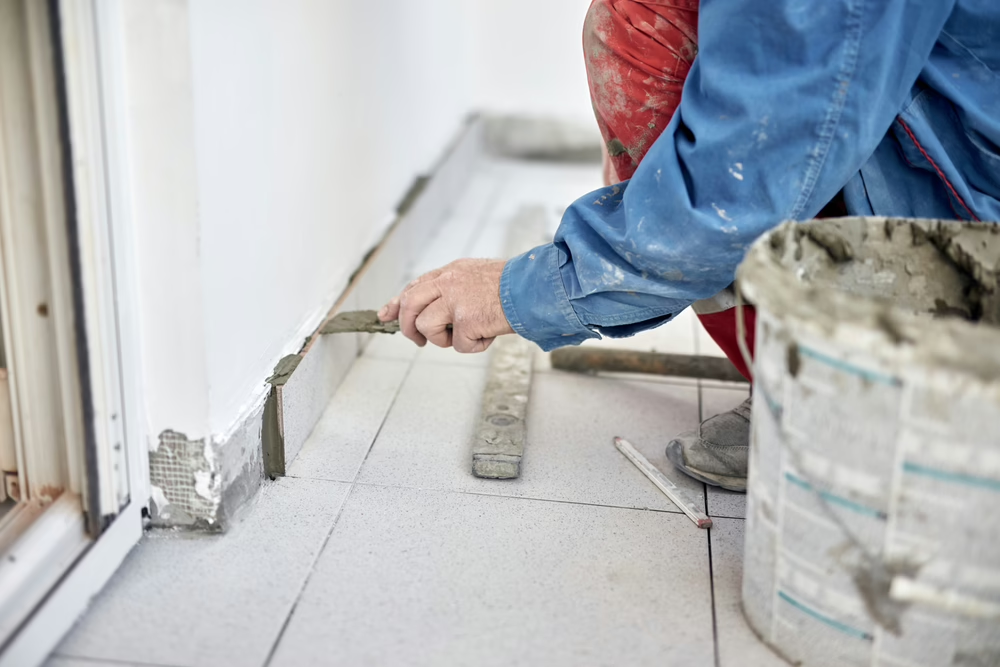
Address Basement and Crawl Space Issues
Crawl spaces and basements naturally retain moisture and water. To identify obvious issues like standing water, damp spots, or musty odors, walk through these areas at regular intervals. These inspections reveal the existence of water intrusion. Use concrete sealant or hydraulic cement to patch foundation wall cracks. Cover exposed soil in crawl spaces with heavy plastic vapor barriers to reduce moisture rising from the ground.
Roof and Gutter Maintenance for Water Damage Prevention
Your roof is the first line of defense against winter water intrusion. Damaged roofs leak water directly into your home during rain and snowmelt.
Inspect Your Roof Carefully
From the ground, use binoculars to examine your roof for missing shingles, curling shingles, or dark spots indicating mold or water damage. If you feel comfortable on a ladder, check the roof closely. Look for debris accumulation and areas where water might pool. Pay special attention to valleys where two roof planes meet, as these areas collect water.
If you find significant damage, hire a professional roofer before winter. Small repairs now prevent large problems later.
Clean and Inspect Gutters
Clogged gutters cause water to back up under the roof shingles and pour down exterior walls. This water then finds its way to your foundation and into your basement. Cleaning gutters is one of the most important parts of your fall home winterization checklist.
Remove all leaves, sticks, and debris from gutters and downspouts. After cleaning, run water through the gutters to check that water flows smoothly. Gutters should slope slightly toward downspouts so that water drains completely.
Extend Downspout Drainage
Downspouts should direct water at least four to six feet away from your foundation. Water dumping next to your home soaks the soil around your foundation, creating pressure that forces water through basement walls and cracks. Install downspout extensions or splash blocks to move water farther away. This simple step prevents significant water damage.
Foundation and Exterior Wall Protection
Your home’s foundation and exterior walls face heavy weather during winter. Water seeping through foundation cracks or gaps around windows causes serious indoor damage.
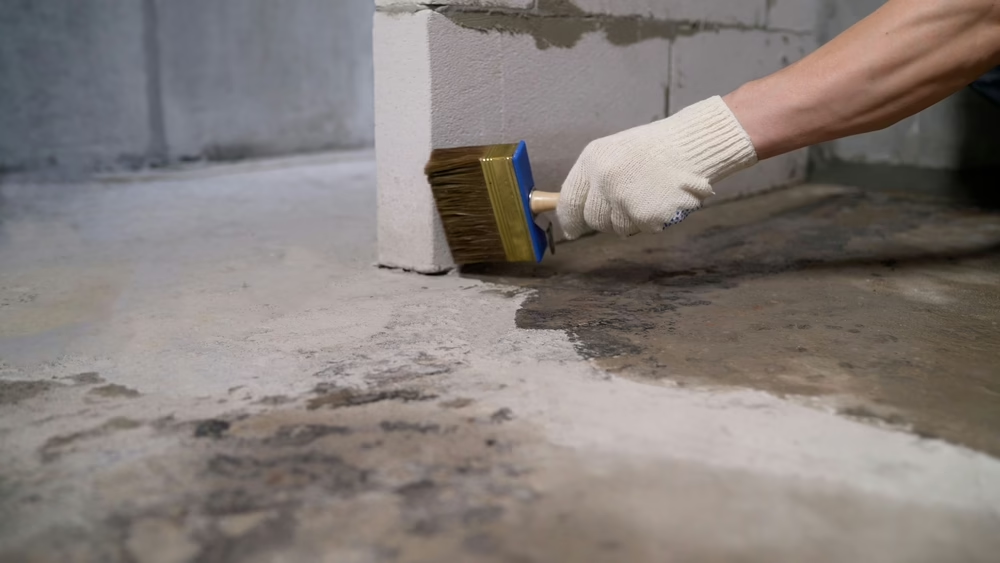
Seal Foundation Cracks
Walk around your foundation and look for visible cracks or gaps. Hairline cracks seem minor but expand over time and allow water entry. Seal small cracks with concrete caulk. Larger cracks (more than one-quarter inch wide) need hydraulic cement, which expands as it dries and creates a tight seal.
Inspect and Caulk Windows and Doors
Check windows and doors for deteriorated caulk or weatherstripping. Run your hand around frames to feel for drafts and air leaks. Gaps around frames allow not only cold air, but also water and moisture to enter. Remove old caulk with a caulk removal tool, clean the area thoroughly, and apply fresh caulk rated for exterior use. Replace weatherstripping on doors if it’s compressed or missing.
Check Exterior Siding and Trim
Walk around your home’s exterior looking for gaps, splits, or areas where siding has pulled away from the house. These gaps let water behind siding, where it causes hidden rot. Caulk gaps immediately. If wood siding is rotted or severely damaged, plan to replace affected sections before winter.
Winterizing Your Home: A Quick Reference Table
| Task | Priority | What to Check |
| Chimney inspection and cleaning | High | Check for blockages, creosote buildup, and structural damage |
| Furnace servicing | High | Professional inspection, filter replacement, and efficiency check |
| Deck and patio sealing | Medium | Apply weather-resistant sealant to wood surfaces |
| Lawn preparation and leaf removal | Medium | Rake leaves, aerate soil, and apply fall fertilizer |
| Garage door maintenance | Medium | Lubricate hinges, test opening and closing smoothly |
| Water heater inspection | Medium | Check for rust, leaks, and proper temperature settings |
| Sump pump testing | High | Pour water to verify pump activates and drains properly |
| Outdoor faucet winterization | Medium | Drain hoses and shut off water supply lines |
Attic and Upper-Level Moisture Management
Many homeowners forget about their attics until problems appear. Attics are common sources of winter moisture and mold growth. Installing a vapor barrier in Voorhees, NJ, or other surrounding areas, is another effective way to prevent attic moisture buildup, helping protect insulation and wood framing from condensation-related damage during winter.
Improve Attic Ventilation
Your attic needs to breathe. Proper ventilation allows moisture to escape and prevents ice dams. Check that your attic has both intake vents (soffit vents) and exhaust vents (ridge vents or roof vents). These should provide roughly one square foot of ventilation for every 150 square feet of attic space.
Walk through your attic in daylight and look for any light coming through the roof. Light means holes where water can enter. If you find holes, mark them and have them professionally repaired.
Insulate Attic Pipes
Pipes running through attics can freeze when not properly insulated. Frozen pipes can burst and flood your home. Wrap exposed pipes with foam pipe insulation before temperatures drop. Pay special attention to water supply lines in unheated spaces.
Professional Help When You Need It
Some winterization tasks require professional expertise. If you find significant roof damage, foundation cracks deeper than one-quarter inch, or signs of major water intrusion, hire qualified contractors. Spending money on professional repairs now costs far less than repairing mold damage or water damage after winter. Similarly, if you have concerns about your HVAC system or detect serious moisture problems, professional inspections provide valuable information.
Preventing Common Winter Water Damage Problems
Understanding how water damage typically occurs helps you spot vulnerabilities.
Ice Dams: Ice dams form when heat from your home melts snow on the roof, then water refreezes at the eaves. This forces water under shingles and into your home. Better attic insulation and ventilation prevent ice dams by keeping roof temperatures consistent. Adequate ventilation allows cold air to flow over the roof, preventing snow melt.
Burst Pipes: Pipes freeze and burst when interior temperatures drop below freezing. Pipes in exterior walls, attics, basements, and crawl spaces face the highest risk. Insulate vulnerable pipes and keep cabinet doors open under sinks to allow warm air circulation.
Wet Basements: Basements collect water through foundation seepage, poorly graded soil directing water toward the foundation, and clogged or missing gutters. Each of these issues can be addressed before winter through the maintenance steps outlined above.
Taking Action Before Winter Arrives
Fall home preparation becomes much easier when you break the work into manageable pieces. Your winterizing house checklist prevents expensive water damage and mold problems that could take months and thousands of dollars to repair. By investing a few weekends, you can protect your home and provide peace of mind throughout the winter months.
The best time to winterize your home is now, while weather permits and before winter water problems develop. Start with the high-priority tasks this week, and your home will be well protected when cold weather arrives. Your future self will thank you when you wake up to winter weather without water damage or moisture problems.
Complete Winterization Supplies and Tools You’ll Need
Before starting your fall home winterization project, gather the right supplies. Having everything on hand makes the work faster and easier. Here’s what you should collect before beginning your winterizing house checklist tasks:
- Gutter scoop, hose with nozzle, and ladder stabilizer for cleaning and inspection
- Caulk gun, exterior caulk, and crack sealant for sealing gaps and foundation repairs
- Weatherstripping and foam pipe insulation for doors, windows, and exposed pipes
- Plastic sheeting, duct tape, and hydraulic cement for crawl space and foundation protection
- Hygrometer, gloves, safety glasses, and flashlight or headlamp for safe, thorough work
Having quality supplies makes winterization more effective. Cheap caulk and sealants fail quickly and require redoing the work next year. Invest in products rated for exterior use and harsh weather conditions. Your hardware store staff can recommend products suitable for your climate zone.

Many homeowners find that gathering supplies over several weeks before starting the project saves money. You can watch for sales and compare prices rather than buying everything at once. Some stores offer bulk discounts on weatherstripping and caulk when purchasing larger quantities.
Testing equipment like the hygrometer helps you monitor whether your winterization efforts actually reduce moisture problems. Before winter fully arrives, you’ll know if additional dehumidification or ventilation improvements are needed. This information guides any adjustments you make to your home systems before extreme cold weather hits.
Taking time to prepare properly means you’ll work safely, efficiently, and effectively. Starting your winterization with all supplies ready prevents frustrating trips back to the store in the middle of projects. Stay ahead of winter moisture problems. Contact Safer Home Services LLC today to schedule an in-home consultation and get expert help protecting your home all season long.
Jack Lyons
Co-owner of Safer Home Services LLC